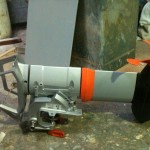
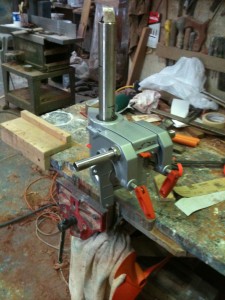
I’m gonna have to kiss goodbye to warranty on the motor cos I took to it with a hacksaw. It doesn’t sound pretty but it has turned out alright, as you can see from the photo. Its more or less the same as a regular Cruise 2, only shorter. I shorted the stainless steel main tube by 190mm. The fairing tube an dthe cables also had to be shrunk by the same amount.
You see, I wanted to be able to position the motor in such a way to give easy access to raising it so it can be out of the water after each use. But its position in the boat, in a well, means it can’t be tilted up in the usual manner, so I’ve made a sliding bracket so it can be lifted vertically. As well I’ve located it slightly forward of where Derek, the designer, had positioned it, and in this position it is too tall. Its now located under the rear seat, rather than under the rear deck, and there’s less headroom in this location.
So this meant I needed to cut about 100mm off the motor to have it fit in the space available. But while I was at it I cut off a bit more so I could raise the prop as high as possible to give even better clearance from underwater obstructions (after all this is to be used as a hire boat and may have to take a grounding now and again 🙂
You might also notice that the lifting handle of the motor has also gone. I had to do this because the handle is used as a heat sink and some extra cooling will need to be added to compensate for this loss. Especially in the hot summers we get here in Australia. A whole lot different to the weather on Lake Starnberg.
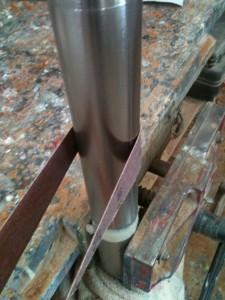
The biggest problem with cutting off the tube is that the top part of the tube, where the bracket fits, is machined to take the bearings that allow the motor to steer. The bottom part of the tube is raw from the foundry and is not a bearing surface. I resorted to fairly basic method of reducing the diameter… I filed it down. I was pretty careful about it though and did a very regular pattern of filing so it was even all around. The guys at Starnberg will be pulling their hair out right about now as they read this.
After the filing I used a strip of emery cloth to smooth it to a very fine surface. In the end the bearings slipped over nicely and move quite freely. If you look closely you’ll see in the photo the ridge still visible near the top of the photo. This was taken down until it was fair.
That’s about all I have time to write just now—I need to get back to sanding and varnishing. The Sanctuary Cove boat show begins next week and we want her to be ready to show. Back soon.


>The guys at Starnberg will be pulling their hair out
Haha – your to late 🙂
Ha ha. And I thought you chose that hair style! –chris